• Painting detail parts?

  • Discussion related to everything about model railroading, from layout design and planning, to reviews of related model tools and equipment. Discussion includes O, S, HO, N and Z, as well as narrow gauge topics. Also includes discussion of traditional "toy train" and "collector" topics such as Lionel, American Flyer, Marx, and others. Also includes discussion of outdoor garden railways and live steamers.
Discussion related to everything about model railroading, from layout design and planning, to reviews of related model tools and equipment. Discussion includes O, S, HO, N and Z, as well as narrow gauge topics. Also includes discussion of traditional "toy train" and "collector" topics such as Lionel, American Flyer, Marx, and others. Also includes discussion of outdoor garden railways and live steamers.

Moderators: 3rdrail, stilson4283, Otto Vondrak

  by deandremouse
 
Hi

I was wondering When applying detail parts,

should one paint them before applying them or afterwards?

And should one use A small aerosol can or Acrylic paint and a paint brush to paint the detail parts?

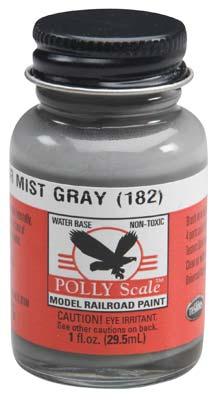
for example pollyscale paint
Image

(I was about to finish detailing a GP15 I had)
  by Mirai Zikasu
 
It really depends on what it is. I prefer using enamels like Floquil for detail stuff as I find the finish to be more consistent, but I'm preferential to enamels in all circumstances for that reason and how they behave with my airbrush.

Anyway, I would recommend painting the items before you put them on so you can fix them if you make a mistake without possibly ruining your model. Avoid using spray cans as they give you very little control and usually blast the paint on very thick and unevenly unless you are very quick and steady with your shots. (I'm not, and I ruined a few shells when I started getting serious about custom painting by using a spray can primer.) If you, a friend, or a family member has an airbrush and compressor, that will give you the cleanest, smoothest finish. Just set the part on a piece of tape, hold it by a clamp, or figure out how else to keep it still, and gently blast away until the part is painted to your liking. If airbrushing is not an option, the next best thing is very gentle, cautious hand painting. Get a soft, small brush, dip it in your paint, dab off excess on a paper towel, and gently brush a THIN (with exponential emphasis on "thin") coat onto the piece. Let it sit for an hour or so, and if there is a spot that's not fully covered, repeat. Depending on the type of part, it might also be good to seal it with a clear coat (Dull, Satin, Gloss, or @w@ OMG SUPER SHINY DESU @w@) depending on what the part is to protect the paint. Exposed parts like trucks can be very prone to chips.
  by green_elite_cab
 
It depends on the situation.

When in doubt, PAINT FIRST. Install later. That way, if you make a mistake, it doesn't damage the model. You can always touch up later.

If the part is a different color than the rest of the model, DEFINITELY paint it first.

The only exception is if you're painting an undecorated locomotive, and the detail will be the same color as the body (for example, on a Conrail locomotive, everything is blue). More often than not, however, details will not be good for surviving the masking process, and you risk paint puddling along the body and detail, ruining the appearance.

Use a small brush with a small amount of paint. If you didn't get enough paint the first dip, thats okay, paint on what you have then dip the tip of the brush in the paint again. Too little paint may only require a dab. To much paint is a more serious problem to fix.

NEVER USE SPRAY CANS ON DETAIL PARTS. I don't care what anyone says, spray cans give off way to much paint (at least over 9,000). You'll obscure the details with a way too thick a coat of paint.

Airbrushes are also problematic with small parts, since they tend to literally blow them away. An airbrush is an ideal tool for "vast" areas, like the body shell of a locomotive, or the concrete skeleton of a building. However, in terms of a locomotive horn, no one will notice brush strokes. Its not worth the frustration to set up the airbrush to paint minuscule parts.

The bottom line- Use common sense. Do as much work "separately" as possible so to minimize damage caused by careless accidents or mistakes.

And don't give yourself more work than you have to, stick to necessary steps. The more steps you add, the more things that can go wrong.
  by Sir Ray
 
In addition to the above advice (I usually end up with a very fine brush and very thinned paint - also, with some colors you can get away with almost dry brushing if the detail piece sticks out enough and is sturdily attached), I'd recommend you get familiar with Art Markers.

Sharpies are good, although their color range can be a bit limited - I use Silver a lot, on very small details like HO car door handles it looks like chrome if you use steady, smooth strokes - there are other Sharpie colors available, but they tend to be rather bright, or something like Gold (not a whole lot of Gold in industrial/commercial items in the modern era - I used gold a few times, for a model antique shop sign, for bracelets on HO scale female figures, and that's about it - silver/steel/chrome are far more common colors out there - heck, for model statues I've airbrushed Bronze anyway, and would airbrush gold to represent Gold-leaf if necessary). For some reason Sharpie black (Sharpie Original?) seems rather shiny, so I tend not to use it much.

I also have several Faber-Castell art markers in Black, Sepia, and a few other colors - these are great for long, narrow details (e.g. strapping bands on cartons, highlighting controls on scale machine tools, and other things). I usually have to prime the detail parts to ensure the marker goes on, covers well, and stays on. Thats when you learn the wonders of double sided tape (or, for me, blue painters tape, one side flat face up, 2 smaller pieces holding the face-up side to a flat piece of stiff cardboard - others have used tape loops, clay, rubber cement, alligator clamps, and Press 'n Seal - I've had mixed success with that).
  by deandremouse
 
green_elite_cab wrote:It depends on the situation.

When in doubt, PAINT FIRST. Install later. That way, if you make a mistake, it doesn't damage the model. You can always touch up later.

If the part is a different color than the rest of the model, DEFINITELY paint it first.

The only exception is if you're painting an undecorated locomotive, and the detail will be the same color as the body (for example, on a Conrail locomotive, everything is blue). More often than not, however, details will not be good for surviving the masking process, and you risk paint puddling along the body and detail, ruining the appearance.

Use a small brush with a small amount of paint. If you didn't get enough paint the first dip, thats okay, paint on what you have then dip the tip of the brush in the paint again. Too little paint may only require a dab. To much paint is a more serious problem to fix.

NEVER USE SPRAY CANS ON DETAIL PARTS. I don't care what anyone says, spray cans give off way to much paint (at least over 9,000). You'll obscure the details with a way too thick a coat of paint.

Airbrushes are also problematic with small parts, since they tend to literally blow them away. An airbrush is an ideal tool for "vast" areas, like the body shell of a locomotive, or the concrete skeleton of a building. However, in terms of a locomotive horn, no one will notice brush strokes. Its not worth the frustration to set up the airbrush to paint minuscule parts.

The bottom line- Use common sense. Do as much work "separately" as possible so to minimize damage caused by careless accidents or mistakes.

And don't give yourself more work than you have to, stick to necessary steps. The more steps you add, the more things that can go wrong.
Okay

I'll use the brush and yeah spray paint can blow away and overcoat the parts.
  by umtrr-author
 
Piling on for "paint first".

I have brushes down to a size 10/0 for this purpose. I surely need these when modeling in N Scale!
  by jwhite07
 
Me three for painting first!

On the other hand, there are cases where you might want to NOT paint detail parts on an already assembled model.

I have a pre-assembled vehicle (one of those near-HO scale Matchbox trucks that you can get for cheap at model railroad shows). I wanted to airbrush an overall matte finish onto it, but of course I didn't want the matte finish to get on the windows, lights, rearview mirrors, and so on. Matchbox uses rivets to hold everything together, so I couldn't disassemble the model without causing almost certain damage. Applying masking tape to some of those little tiny areas would have been nearly impossible. Instead, I used art masking fluid (sometimes called "frisket"), which is essentially a liquid latex rubber that can be applied with a fine brush (or better yet, a cheap glue applicator brush) and then easily peeled off after it is dry. I simply "painted" the frisket onto the parts I didn't want airbrushed, let it dry, did my airbrushing, and then peeled off the frisket. Worked great!
  by green_elite_cab
 
I have not had a good experience masking with that stuff. I have micro mask fluid, and it just seems to gum up but not come off without lots of frustration.
  by jwhite07
 
Do you by chance use water-based acrylics with it? I've read Micro Mask is also water-based, so that might contribute to the poor results. Art masking fluid (I use the Windsor and Newton stuff, which is ammonia-based) is used by artists painting with watercolors and can be removed from paper without damaging it or leaving a residue. I certainly had zero difficulty peeling it cleanly and completely off plastic. Only problem I had is the stuff gums up brushes somethin' fierce and it's very hard to get it out of the bristles, which is why I mentioned using glue applicator brushes instead.
  by jaystreetcrr
 
A couple of exceptions to some tips posted above...sometimes it's easier to spray a lot of detail parts when they're still on a plastic sprue or brass etching gate. It can be so much easier than handling and brush painting a lot of individual small parts. I wouldn't do it if there's a lot of fine detail that would be obscured by paint or if touching up after removing from the sprue is more work that it's worth.
For example, with a plastic factory kit with a lot of windows, I might do a light spray with a color close to the original plastic to take away the plastic shine, then come back with a big brush and some washy weathering color or alcohol/india ink. So much faster that doing each individual window.
Or I might hit a bunch of brass etchings with a light coat of primer then brush paint. Straight brushing would go on streaky and take a couple of coats before the shiny brass didn't show.
A little prep goes a long way too...dish soap and warm water for plastic and a vinegar bath and water rinse for brass, so whatever kind of painting you do, it'll stick better.
  by deandremouse
 
I found it simpler to paint the details then put them on and touch up a little. It came out fine actually.